

Simple, practical projects to build your confidence and skill with every row
If you’ve just picked up a crochet hook for the first time (or are getting back into it after a break), starting with flat projects is a great way to build your skills. Flat crochet means no increasing, no shaping, and no sewing—just stitches, straight rows, and a satisfying finish.
These three beginner projects—a bookmark, washcloth, and coaster—are perfect for practicing basic stitches like chain, single crochet, and half double crochet. Plus, they work up quickly and actually do something, which is always a bonus when you’re learning!

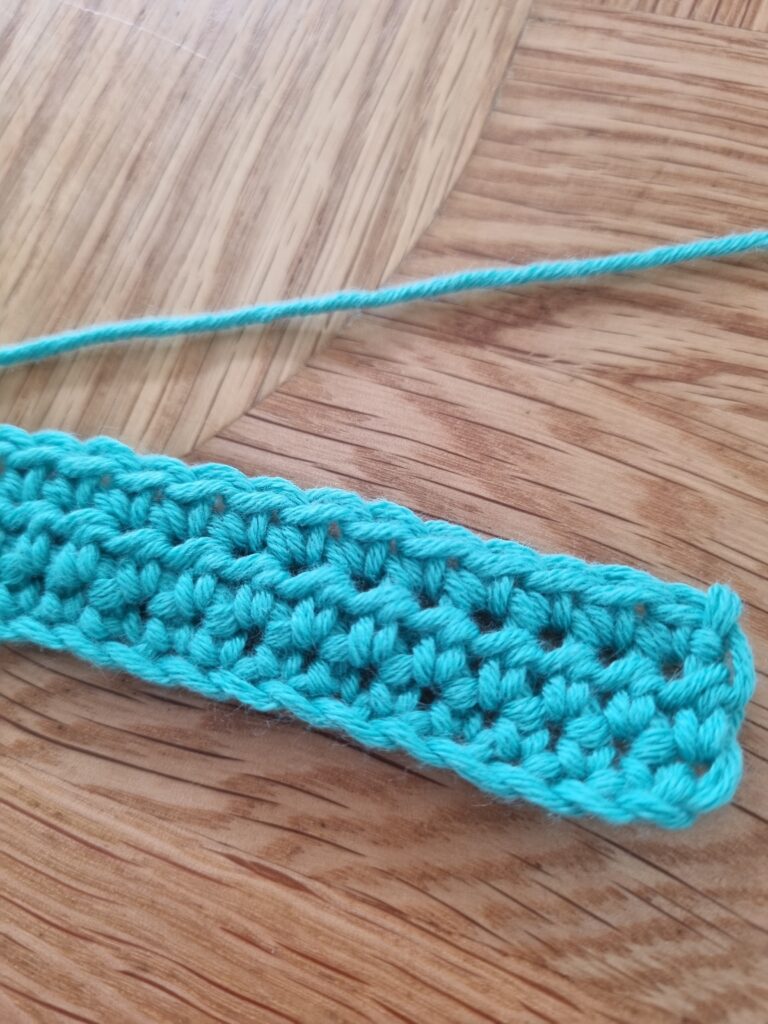
1. Bookmarks for beginners
A quick, lightweight project that lets you practice control and edge neatness,
- Small and manageable, so you need little yarn and little time to practice.
- Helps you focus on tension and keeping straight edges
- Customisable with colours, yarn weight, or stitch pattern
Materials:
- Yarn: Lightweight yarn (cotton or smooth acrylic is ideal)
- Hook: 3.5–4.5 mm (check the yarn label)
- Yarn needle for weaving in ends
- Scissors
- Optional: Tassel, beads, or charm
Stitches used:
- Chain (ch)
- Single crochet (sc) & half double crochet (hdc)
- Make a slip knot and chain 20 (this will be your bookmark height).
- Row 1: Starting in the second chain from your hook, work 1 single crochet in each chain across. CH1, turn.
- Row 2: HDC into each stitch along to end, CH1, turn.
- Row3: SC across then fasten off and weave in the ends.
You could add decorations or start from the bottom to the top instead, simply use your starting chains as your width and alternate SC and HDC rows to your desired height.
Optional extras:
- Add a simple sc border around the edges to neaten them up.
- Attach a small tassel or charm to one end with a looped chain.
Tip:
If your edges are wobbly, count your stitches at the end of each row to make sure you’re not accidentally adding or dropping stitches. Use a stitch marker in the first stitch of each row until it becomes automatic.
2. Beginner-Friendly Washcloth
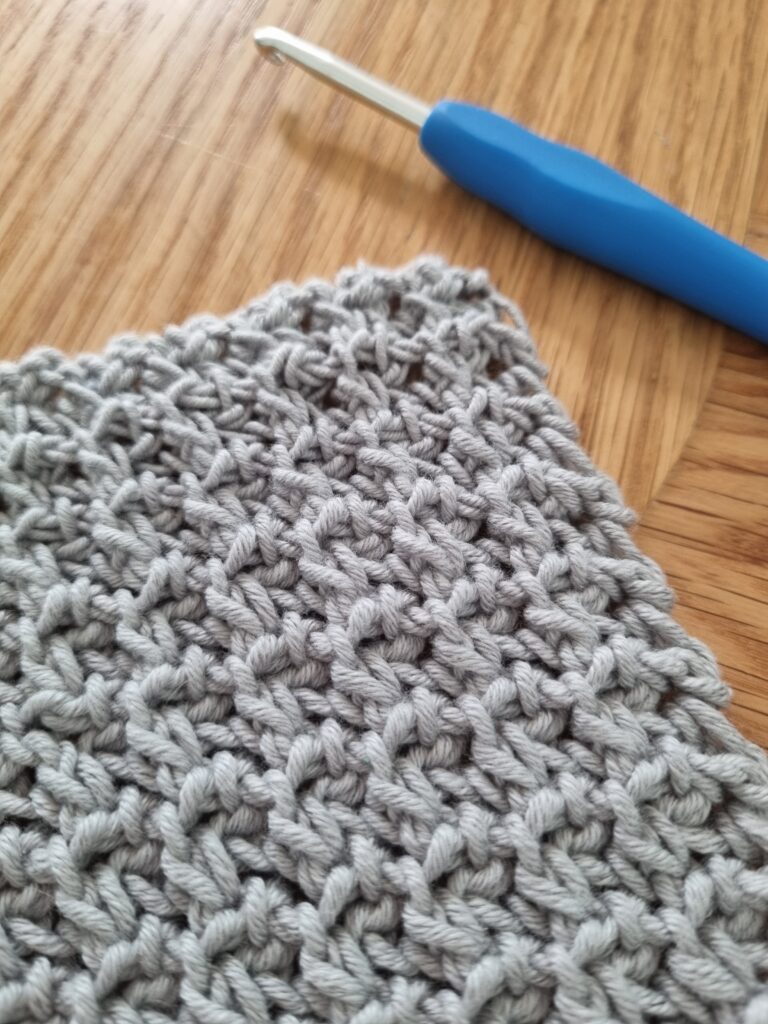
Perfect for building rhythm and experimenting with different stitches and textures
Why it’s great for beginners:
- Washcloths don’t need to be perfect to be useful, so it doesn’t matter if your thread frays or has a weird kink in it to continue (as you see in my grey washcloth I continued even though the yarn got kinked due to a snap and looks thinner in the one section.
- They’re great practice for keeping rows even and consistent.
- You can try different stitch patterns or just repeat a single one to build muscle memory.
Materials:
- Yarn: 100% cotton yarn (absorbs water and holds up well)
- Hook: 4.5 mm–5.5 mm
- Yarn needle and scissors
Stitches used:
- Chain (ch)
- Single Crochet 2 Together (sc2tog)
Instructions:
- Make a slip knot and chain 26 (or more, depending on how wide you want it).
- Row 1: Starting with the second ch on the hook sc2tog, CH, sc2tog, CH to last stitch. CH then SC in the final stitch. CH, TURN.
- Row 2–25 (or until square): continue sc2tog CH along to end stitch, CH SC in final stitch, CH, TURN.
Optional variations:
- Try alternating sc and sc2tog for a denser texture.
- Work in back loops only to add ribbing.
Tip:
Want your washcloth to look more finished? Work one round of single crochet around all four edges, placing 3 stitches in each corner. This cleans up the edges and makes it look more polished.
3. Simple Circular Double Crochet Coaster
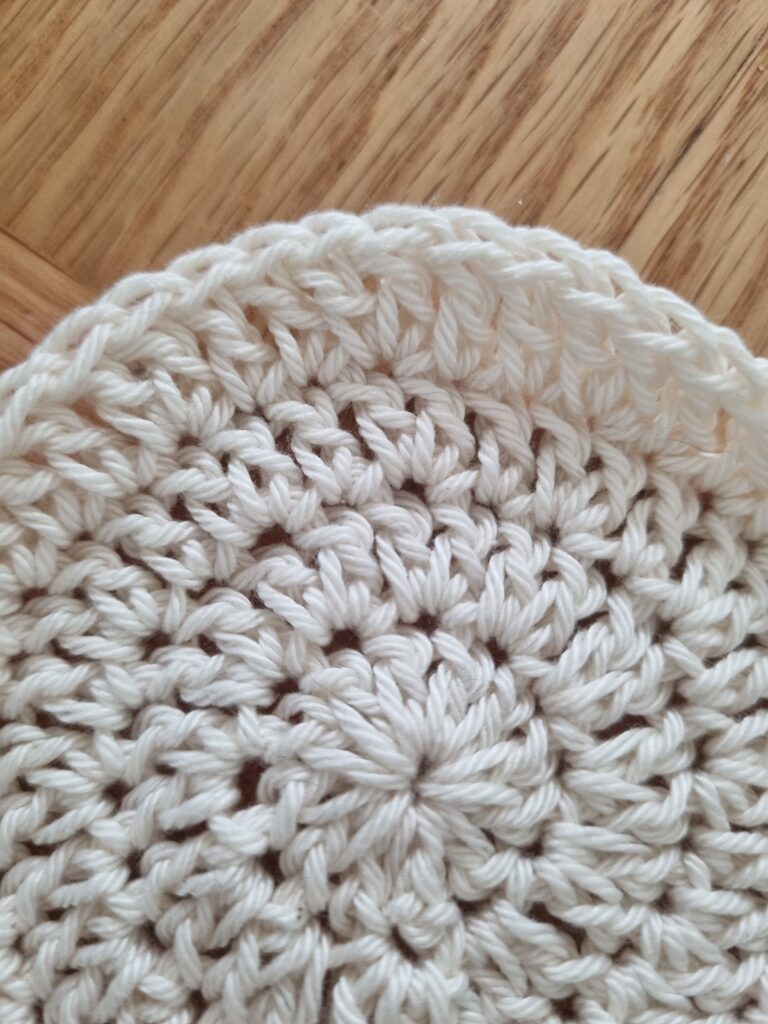
A beginner-friendly project that teaches working in the round with taller stitches
Why it’s great for beginners:
- Teaches you how to crochet in the round using double crochet (dc)
- Gets you comfortable with increases and counting stitches
- Quicker to make than single crochet versions
- Looks pretty and is practical—win-win!
Materials:
- Yarn: Worsted weight cotton yarn (great for absorbency)
- Hook: 5 mm crochet hook
- Yarn needle and scissors
- Optional: Stitch marker to keep track of rounds
Stitches used:
- Magic ring (or chain-4 loop)
- Chain (ch)
- Double crochet (dc)
- Slip stitch (sl st)
- Start with a magic ring, or: chain 4 and join with a slip stitch to form a loop.
- Round 1: Chain 2 (counts as your first dc). Work 11 dc into the ring. Join with a slip stitch to the top of the chain-2. (12 stitches total)
- Round 2: Chain 2. 2 dc in each stitch around. Join with sl st. (24 stitches)
- Round 3: Chain 2. 1 dc in next stitch, 2 dc in next stitch—repeat around. Join. (36 stitches)
- Round 4: Chain 2. 1 dc in next 2 stitches, 2 dc in next stitch—repeat around. Join. (48 stitches)
- Finish: Slip stitch in next stitch to smooth the edge. Fasten off and weave in ends.
Optional finishing touches:
- Add a single round of sc or reverse sc (crab stitch) around the edge for structure.
- Block the coaster lightly by pinning it into a circle shape and spraying with water. Let it dry flat.
Tip:
To keep the circle flat, make sure you’re increasing evenly and not skipping stitches. If it starts to ripple or cup, double-check your stitch count at the end of each round.


Leave a Reply